5.7 Vortec Crankshaft Position Sensor Symptoms: Causes, Diagnosis & Fix

By the CarsDailyHub Editorial Team | Automotive writers; every article fact-checked against GM service documentation and OEM specifications | Updated June 2026
Quick Answer: A bad crankshaft position sensor on a 5.7 Vortec (or 4.3L/5.0L) GM engine causes crank-but-no-start conditions, intermittent stalling, misfires, erratic tachometer readings, and reduced fuel economy. The sensor is a 3-wire Hall Effect type that can be tested with a multimeter in DC volts mode. The most common codes are P0336, P0337, P0338, and P0339. Average replacement cost: $30-60 in parts (DIY) or $190-280 at a shop. The sensor is located on the timing chain cover on the passenger side.
This guide covers crankshaft position sensor diagnosis on 1996-2007 GM Vortec engines (4.3L V6, 5.0L V8, 5.7L V8) found in Chevy, GMC, Cadillac, and Oldsmobile trucks and SUVs. Specifications reference GM service documentation. Last reviewed: June 2026.
Table of Contents
- What the Crankshaft Position Sensor Does
- Symptoms of a Bad CKP Sensor (Ranked by Frequency)
- What Causes CKP Sensor Failure?
- How to Diagnose the CKP Sensor Step by Step
- How to Test the CKP Sensor with a Multimeter
- How to Replace the CKP Sensor
- After Replacement: The Relearn Procedure
- Cost Breakdown: DIY vs Shop
- When to Call a Mechanic
- Frequently Asked Questions
- Sources & References
What the Crankshaft Position Sensor Does
The crankshaft position sensor (CKP sensor) tells the engine computer (PCM/ECM) exactly where the crankshaft is in its rotation. This information is critical for two things: ignition timing (when to fire the spark plugs) and fuel injection timing (when to pulse the injectors).
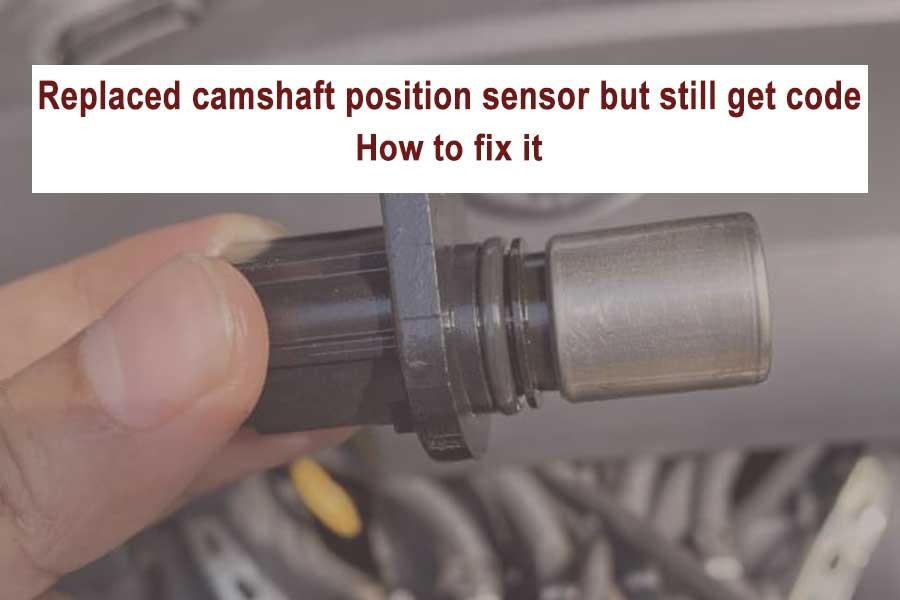
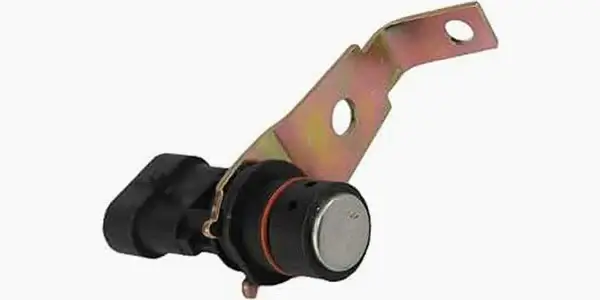
On the 4.3L, 5.0L, and 5.7L Vortec engines, the CKP sensor is a Hall Effect type. It is a 3-wire sensor that receives 12 volts on circuit A, ground on circuit B, and produces a 5-volt ON/OFF pulse signal on circuit C. The signal is generated by a notched “target wheel” (reluctor ring) mounted on the crankshaft. As each notch passes the sensor, the sensor sends a 5-volt pulse to the PCM. The PCM uses these pulses to determine crankshaft position and RPM.
If the CKP sensor fails, the PCM does not know when to fire the spark plugs or pulse the fuel injectors. The engine cranks but does not start. No spark, no fuel. This is the most common failure mode.
Symptoms of a Bad CKP Sensor (Ranked by Frequency)
Based on owner reports across GM truck and SUV forums, here are the symptoms ranked by how often they appear:
| Symptom | Frequency | Severity |
|---|---|---|
| Engine cranks but will not start | Very high | 🔴 Critical |
| No spark from ignition coil | Very high | 🔴 Critical |
| Fuel injectors do not pulse | Very high | 🔴 Critical |
| Intermittent stalling while driving | High | 🔴 Critical |
| Check engine light (P0336-P0339) | High | 🟡 Moderate |
| Erratic tachometer (RPM reads zero or jumps) | Medium | 🟡 Moderate |
| Rough idle or misfire | Medium | 🟡 Moderate |
| Engine hesitation or surging | Medium | 🟡 Moderate |
| Reduced fuel economy | Low | 🟡 Minor |
| Transmission shifting issues | Low | 🟡 Moderate |
The most common pattern: The engine starts fine one day, then cranks but will not start the next. This intermittent no-start is the hallmark of a failing CKP sensor on the Vortec. The engine cranks normally, but there is no spark and no fuel injection because the PCM cannot determine crankshaft position.
The tachometer test: When cranking the engine, watch the tachometer. If the RPM reading stays at zero while cranking, the CKP sensor is likely not producing a signal. A healthy CKP sensor will show 150-250 RPM while cranking.
What Causes CKP Sensor Failure?
| Cause | Likelihood | Notes |
|---|---|---|
| Heat damage (sensor is near engine) | High | Vortec CKP sensors sit on the timing cover, exposed to engine heat |
| Wiring harness damage | Medium | Wiring near the sensor is exposed to road debris and heat |
| Oil contamination | Medium | Oil leaks from the front main seal can contaminate the sensor |
| Corroded electrical connector | Medium | Road salt and moisture corrode the 3-pin connector |
| Internal sensor failure (age) | Low | Most sensors last 100,000+ miles before internal failure |
| Damaged reluctor ring | Rare | The notched wheel on the crankshaft can be damaged during repairs |
How to Diagnose the CKP Sensor Step by Step
Tools You Need
| Tool | Purpose | Cost |
|---|---|---|
| OBD2 scanner | Read and clear codes | $25-40 (basic), $200+ (bidirectional for relearn) |
| Digital multimeter | Test sensor voltage and signal | $20-50 |
| 1/2-inch ratchet and socket | Turn crankshaft by hand | $30 |
| Wire-piercing probe or back-probe | Access sensor signal wire | $10 |
| Jack and jack stands | Access crankshaft pulley | $50-100 |
Step 1: Read the Codes
Plug in your OBD2 scanner and read all stored codes. Look for:
– P0336 – CKP Sensor Circuit Performance
– P0337 – CKP Sensor Circuit Low Frequency
– P0338 – CKP Sensor Circuit High Frequency
– P0339 – CKP Sensor Circuit Intermittent
If you see any of these, the CKP sensor circuit has a problem. If you see no codes but the engine cranks and will not start, the sensor may have failed completely without setting a code (this happens on some Vortec models).
Step 2: Check for Spark
Pull a spark plug wire, insert a spare spark plug or a spark tester, ground it to the engine block, and have someone crank the engine. If there is no spark, the CKP sensor is a prime suspect.
Step 3: Check for Fuel Injector Pulse
Use a noid light ($10) plugged into a fuel injector connector. Crank the engine. If the noid light does not flash, the PCM is not pulsing the injectors, which confirms a CKP sensor or PCM issue.
Step 4: Test the CKP Sensor with a Multimeter
See the next section for the detailed multimeter test procedure.
How to Test the CKP Sensor with a Multimeter
The Vortec CKP sensor is a 3-wire Hall Effect sensor. You cannot test it with an Ohmmeter (resistance test). You must test it in DC volts mode while manually turning the crankshaft.
Why turn by hand? Using the starter motor spins the crankshaft too fast for a multimeter to capture the ON/OFF pulses accurately. The multimeter averages the pulses and you get a meaningless reading. Turning by hand lets you see the 0V to 5V transitions clearly.
Test Procedure
-
Lift the front of the vehicle and support on jack stands. You need access to the crankshaft pulley bolt.
-
Disable the fuel system. Disconnect the Spider fuel injector connector to prevent fuel injection during testing.
-
Disable the ignition system. Disconnect the ignition coil or ignition control module to prevent spark during testing.
-
Set your multimeter to DC volts (20V range).
-
Connect the red probe to the CKP signal wire (circuit C). Use a wire-piercing probe or back-probe on the connector. The sensor must remain connected to its harness.
-
Connect the black probe to the battery negative terminal or a clean ground point.
-
Turn the ignition to ON (do not start the engine).
-
Manually turn the crankshaft using a 1/2-inch ratchet and the correct socket on the crankshaft pulley bolt. Turn slowly, about one revolution per 2-3 seconds.
-
Watch the multimeter. You should see the voltage alternate between 0 volts and 5 volts as each reluctor ring notch passes the sensor.
Reading the Results
| Multimeter Reading | Diagnosis | Action |
|---|---|---|
| Alternates 0V to 5V | Sensor is working | Look elsewhere for the no-start cause |
| Stays at 0V | No signal output | Check power (circuit A) and ground (circuit B) first, then replace sensor |
| Stays at 5V | Signal stuck high | Replace sensor |
| Erratic or weak signal | Sensor is failing intermittently | Replace sensor |
Check Power and Ground First
Before condemning the sensor, verify it has power and ground:
-
Check power (circuit A): With the ignition ON and the sensor connected, back-probe circuit A. You should read 12 volts. If not, check the wiring and fuse.
-
Check ground (circuit B): Back-probe circuit B with the red probe and connect the black probe to battery positive. You should read 12 volts (reverse-lit ground test). If not, the ground circuit is open.
If power and ground are good but the signal is absent or erratic, replace the sensor.
How to Replace the CKP Sensor
The CKP sensor on the 4.3L, 5.0L, and 5.7L Vortec is located on the timing chain cover on the passenger side, near the bottom. Access is easier from underneath the vehicle.
Skill level: Intermediate. Time: 45-90 minutes.
Steps
-
Disconnect the negative battery terminal (10mm socket).
-
Raise and support the vehicle on jack stands or a lift.
-
Locate the CKP sensor on the timing chain cover, passenger side, near the bottom.
-
Disconnect the electrical connector from the sensor. Squeeze the tab and pull.
-
Remove the mounting bolt (usually a 10mm bolt). Pull the sensor straight out.
-
Inspect the old sensor for physical damage, oil contamination, or a cracked body.
-
Install the new sensor. Push it in until seated. Install and tighten the mounting bolt. Do not overtighten.
-
Reconnect the electrical connector. Listen for the click.
-
Reconnect the battery.
-
Perform the relearn procedure (see next section).
Parts needed:
– CKP sensor (genuine GM or quality aftermarket like Standard Motor Products or ACDelco): $30-60
– 10mm socket and ratchet
– Jack and jack stands
After Replacement: The Relearn Procedure
On GM vehicles, after replacing the CKP sensor, you must perform a “Crankshaft Position Variation Learn” procedure. Without it, the P0315 code will not clear and the engine may run poorly.
You need a bidirectional scan tool for this. A basic OBD2 reader cannot do it. See our guide on what scanner can relearn a crankshaft position sensor for scanner recommendations.
Quick Relearn Steps
- Connect the scanner to the OBD2 port.
- Turn ignition to ON (do not start engine).
- Navigate to: Special Functions > Crankshaft Position Variation Learn.
- Follow the on-screen prompts (start engine, accelerate to specified RPM, release throttle).
- Wait for “Relearn Successful” confirmation.
- Clear all codes.
Manual Relearn (Some Models Only)
Some GM models allow a manual relearn without a scanner:
1. Start the engine and let it reach operating temperature.
2. Turn the engine off and wait 30 seconds.
3. Restart and accelerate to 3,000 RPM, then release the throttle.
4. Repeat 3 times.
5. Let idle for 2 minutes.
If the P0315 code persists after a manual relearn, you need a scanner-based relearn.
Cost Breakdown: DIY vs Shop
| Service | DIY Cost | Shop Cost (US avg) | Time |
|---|---|---|---|
| CKP sensor replacement | $30-60 (part) | $190-280 parts + labor | 45-90 min |
| CKP sensor test (multimeter) | $20-50 (multimeter) | $80-150 diag | 30-60 min |
| OBD2 code scan | $25-40 (scanner) | Free at parts stores | 5-15 min |
| Crankshaft relearn (scanner) | $200-350 (bidirectional scanner) | $80-150 at shop | 10-15 min |
| Towing (if no-start) | – | $50-150 | varies |
Total DIY cost: $50-110 (sensor + multimeter, if you already have a scanner)
Total shop cost: $270-430 (diagnosis + sensor + relearn)
When to Call a Mechanic
Call a mechanic if:
– You do not have a safe way to lift and support the vehicle (the sensor is accessed from underneath)
– The sensor bolt is seized and will not come out (common on older vehicles in salt-belt states)
– After replacing the sensor, the engine still cranks but will not start (the problem may be the ignition control module, PCM, or wiring harness, not the sensor)
– You do not have a bidirectional scanner for the relearn procedure
Do not DIY if: The vehicle is your only transportation and you cannot afford to have it apart for more than a few hours. A shop can do the entire job (diagnosis, replacement, relearn) in 2-3 hours.
Frequently Asked Questions
Q: Will a bad crankshaft position sensor throw a code on a 5.7 Vortec?
A: Sometimes. The PCM often does not set a specific CKP code when the sensor fails completely. The most common codes are P0336 (circuit performance), P0337 (low frequency), P0338 (high frequency), and P0339 (intermittent). However, many Vortec owners report a crank-but-no-start condition with no codes stored. If the sensor fails completely, the PCM may not detect it because it never receives a signal to evaluate. In that case, you need to test the sensor with a multimeter.
Q: Can I test the crankshaft position sensor with an Ohmmeter?
A: No. The Vortec CKP sensor is a Hall Effect type, not a magnetic type. Hall Effect sensors require power and ground to produce a signal, and they cannot be tested with a resistance (Ohms) measurement. You must test the sensor in DC volts mode while manually turning the crankshaft. The test takes 15-20 minutes with a multimeter and a ratchet.
Q: How long does a crankshaft position sensor last on a 5.7 Vortec?
A: Most CKP sensors on Vortec engines last 100,000-150,000 miles. Heat is the primary killer, as the sensor sits on the timing chain cover near the engine. If your Vortec has over 100,000 miles and is experiencing intermittent no-start conditions, the CKP sensor is a prime suspect. Oil leaks from the front main seal can also contaminate the sensor and shorten its life.
Q: Can I drive with a bad crankshaft position sensor?
A: If the sensor is failing intermittently, you may be able to drive, but the engine may stall without warning. If the sensor has failed completely, the engine will crank but will not start. You cannot drive with a completely failed CKP sensor. If you are experiencing intermittent stalling, do not drive on highways or in traffic until the sensor is replaced.
Q: Where is the crankshaft position sensor located on a 5.7 Vortec?
A: The CKP sensor is located on the timing chain cover on the passenger side, near the bottom of the engine. It is a 3-wire sensor mounted with a single 10mm bolt. Access is from underneath the vehicle. You will need to raise and support the vehicle on jack stands or a lift to reach it.
Q: Do I need to do a relearn after replacing the crankshaft position sensor on a GM?
A: Yes, on almost all GM vehicles. After replacing the CKP sensor, you must perform a Crankshaft Position Variation Learn procedure. Without it, the P0315 code will not clear and the engine may run poorly (rough idle, hesitation, poor fuel economy). You need a bidirectional scan tool for the relearn, or you can try the manual throttle procedure on some models. See our guide on scanners for CPS relearn for details.
Sources & References
- General Motors – Vortec 4.3L/5.0L/5.7L Service Manual (GM Service Information)
- ACDelco – Crankshaft position sensor product specifications
- SAE J2012 – OBD-II Diagnostic Trouble Code definitions (P0336, P0337, P0338, P0339, P0315)
- NHTSA – Vehicle complaint database for GM trucks and SUVs (nhtsa.gov)
- RepairPal – Average repair cost estimates for GM crankshaft position sensor replacement
- GM truck owner communities – GMT400.com and SilveradoSierra.com forums
Related articles on CarsDailyHub:
– Car Problem Solver: Complete Symptom Guide
– What Scanner Can Relearn a Crankshaft Position Sensor? Top 3 Picks
– How to Reset Crankshaft Position Sensor Without a Scanner
– What to Do After Replacing Crankshaft Sensor: Essential Steps
– Ford 5.4 Crankshaft Position Sensor Symptoms: Causes, Symptoms & Fix